
How to set up your menu for online ordering
Build a menu guests can order from in a few taps: categories, dishes with photos and prices, sizes, add-ons, allergens and sold-out items.
Guests ordering online can’t ask a server what’s in a dish or whether it comes in a large. Your menu has to answer that for them. A clear menu means fewer abandoned baskets, fewer phone calls mid-service and fewer orders the kitchen can’t make.
This guide takes you from an empty menu to one guests can order from, in the order that saves you the most time.
Short on time? Setup and moving your menu from your current system are free. Your account manager can build it for you.
Before you start
Have these to hand. Adding them as you go is slower than having them ready.
- Your dishes and prices, grouped the way your printed menu is.
- A photo of each dish, as JPG or PNG files of up to 5 MB.
- Allergen and dietary information for each dish.
- Any sizes (small, large) and extras (sauces, toppings) you offer, with their prices.
Step 1: Create your categories
Categories are the sections guests scroll through, such as Starters, Pizza or Desserts. Create them first so every dish has somewhere to go.
- Go to Menu in the sidebar, then open the Categories tab.
- Select Add category.
- Give it the name guests know from your printed menu, and a short description. “Wood-fired, 48-hour dough” tells a guest more than “Pizzas”.
- Repeat for each section, then drag the categories (or use the move buttons) into the order guests should see them.
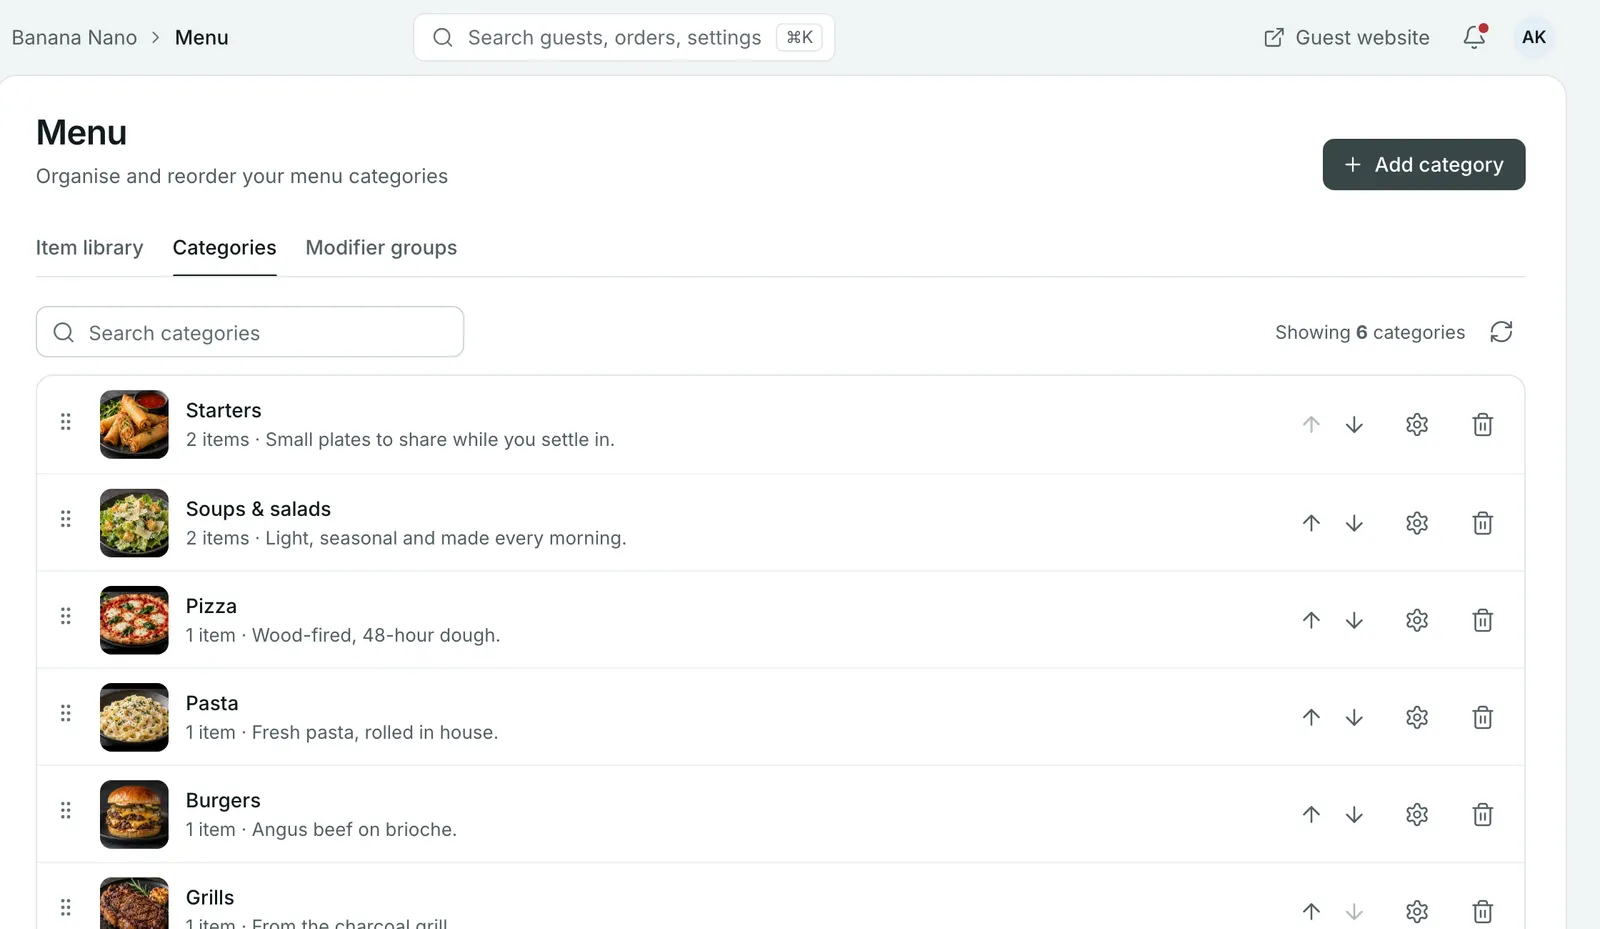 Each category shows how many items it holds and its description.
Step 2: Add your first dish
- Open the Item library tab and select Add item.
- Under Basic information, choose the Type, then fill in Name, Category, Price and Description.
- Add a Kitchen nickname if your team uses a shorter name. It’s printed on kitchen tickets instead of the full menu name.
- Upload photos under Images. The first one is the cover.
- Check the Menu card preview on the right. It shows the dish the way guests will see it.
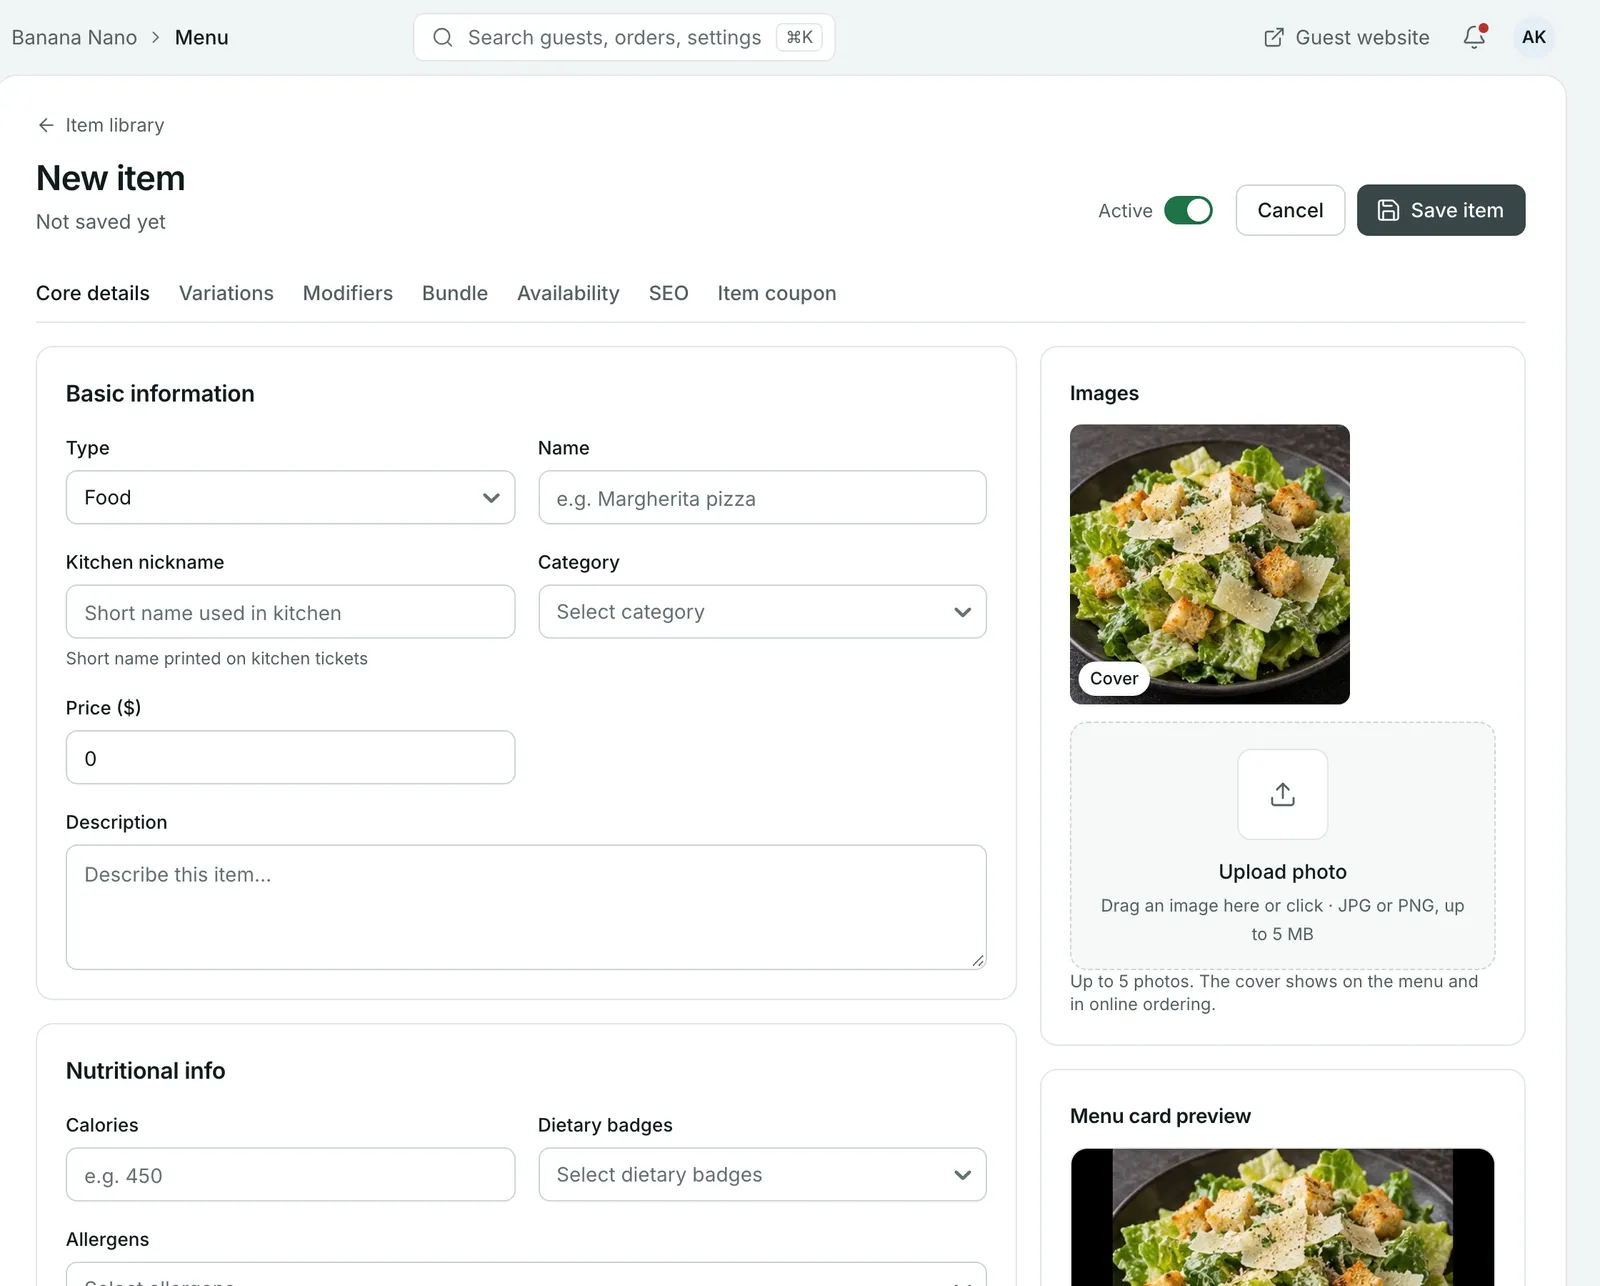 The New item form. The tabs along the top hold sizes, extras, availability and search settings.
Write the description for someone deciding what to order: what it is, how it’s cooked and what comes with it. One or two sentences is enough.
Step 3: Add allergens and dietary badges
Further down the Core details tab, under Nutritional info, add Calories if you show them, choose any Dietary badges (such as vegetarian or gluten-free) and select the Allergens the dish contains.
Guests with allergies look for this before they order, so fill it in for every dish, including the ones without obvious allergens.
Step 4: Offer sizes with variations
Use variations when guests choose one version of a dish, such as a small, medium or large pizza.
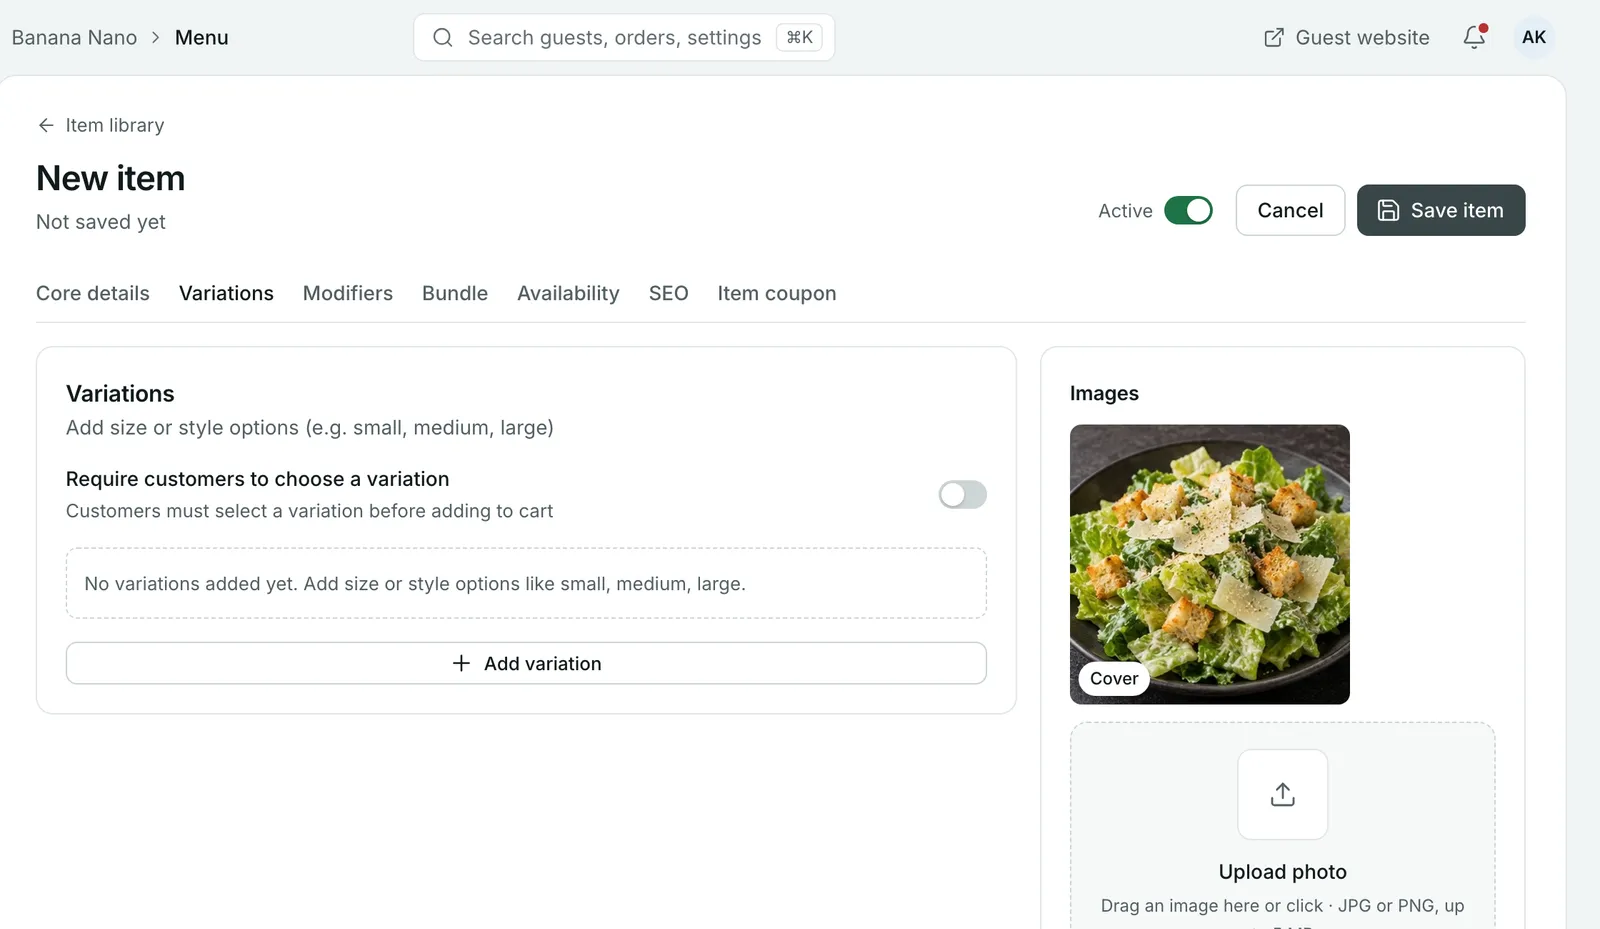
- Open the Variations tab on the dish.
- Select Add variation, name it and set its price.
- Add the other sizes or styles.
- Turn on Require customers to choose a variation if the dish can’t be ordered without one. Guests then have to pick a size before it goes in their basket.
Step 5: Let guests customise with modifier groups
Modifier groups are the extra choices on a dish: toppings, sauces or how a steak is cooked.
- Open the Modifiers tab and select Add modifier group.
- Name the group, such as “Sauce” or “Extras”.
- Add the choices, with an extra price where there is one.
- Set the minimum and maximum number of choices. These decide whether the group is required or optional.
Two common set-ups:
| Group | Min | Max | What the guest sees |
|---|---|---|---|
| Cooked: Medium, Well done | 1 | 1 | Required. They pick exactly one. |
| Extras: cheddar, bacon, avocado | 0 | 3 | Optional. They can add up to three. |
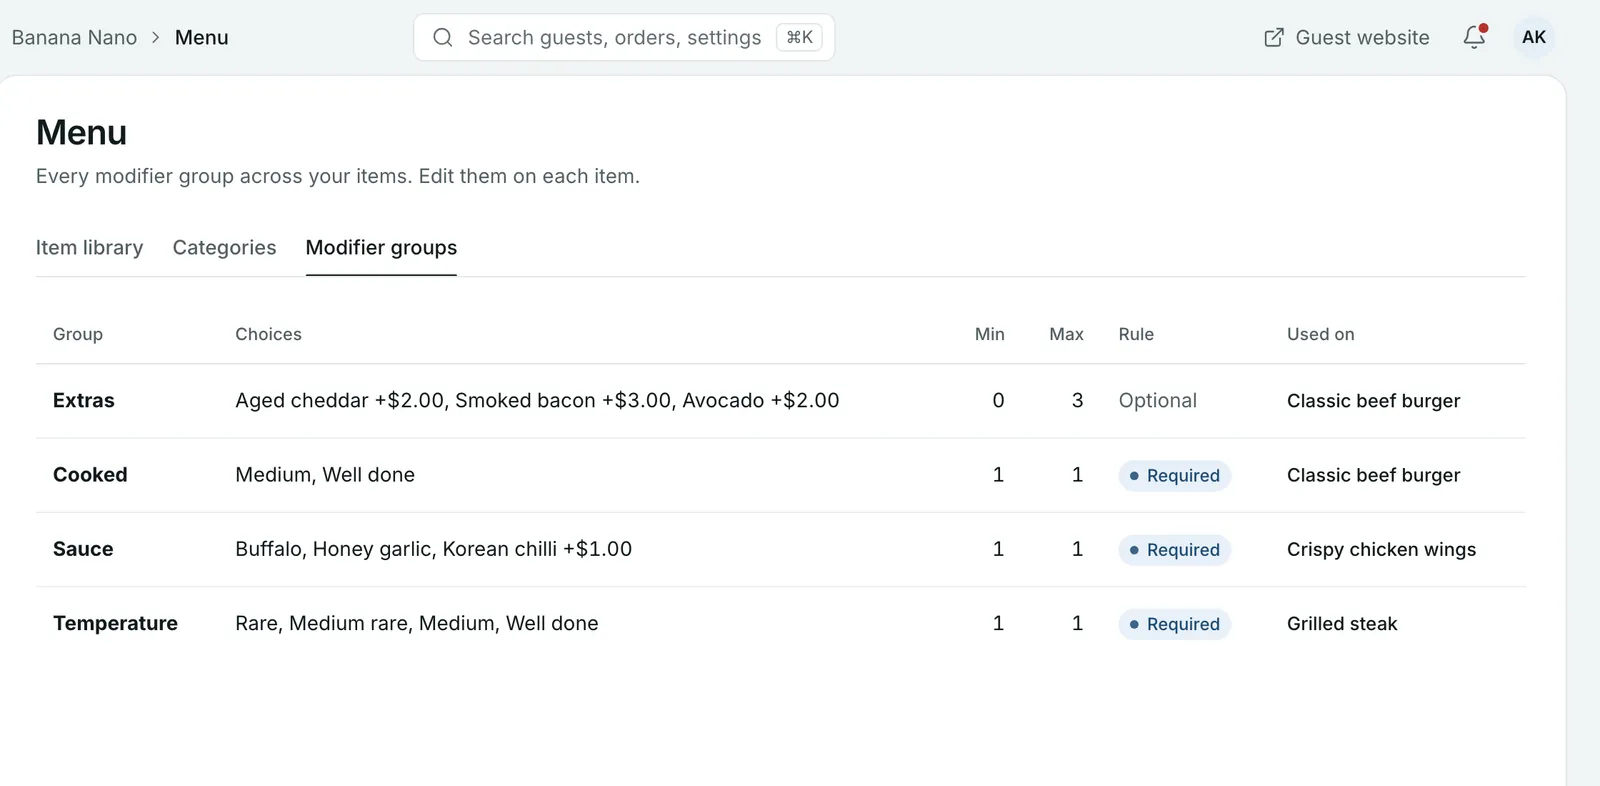
To see every group across your menu, open the Modifier groups tab on the Menu page. It lists each group’s choices, limits and the dishes it’s used on. You edit a group from the dish it belongs to.
Step 6: Control when dishes can be ordered
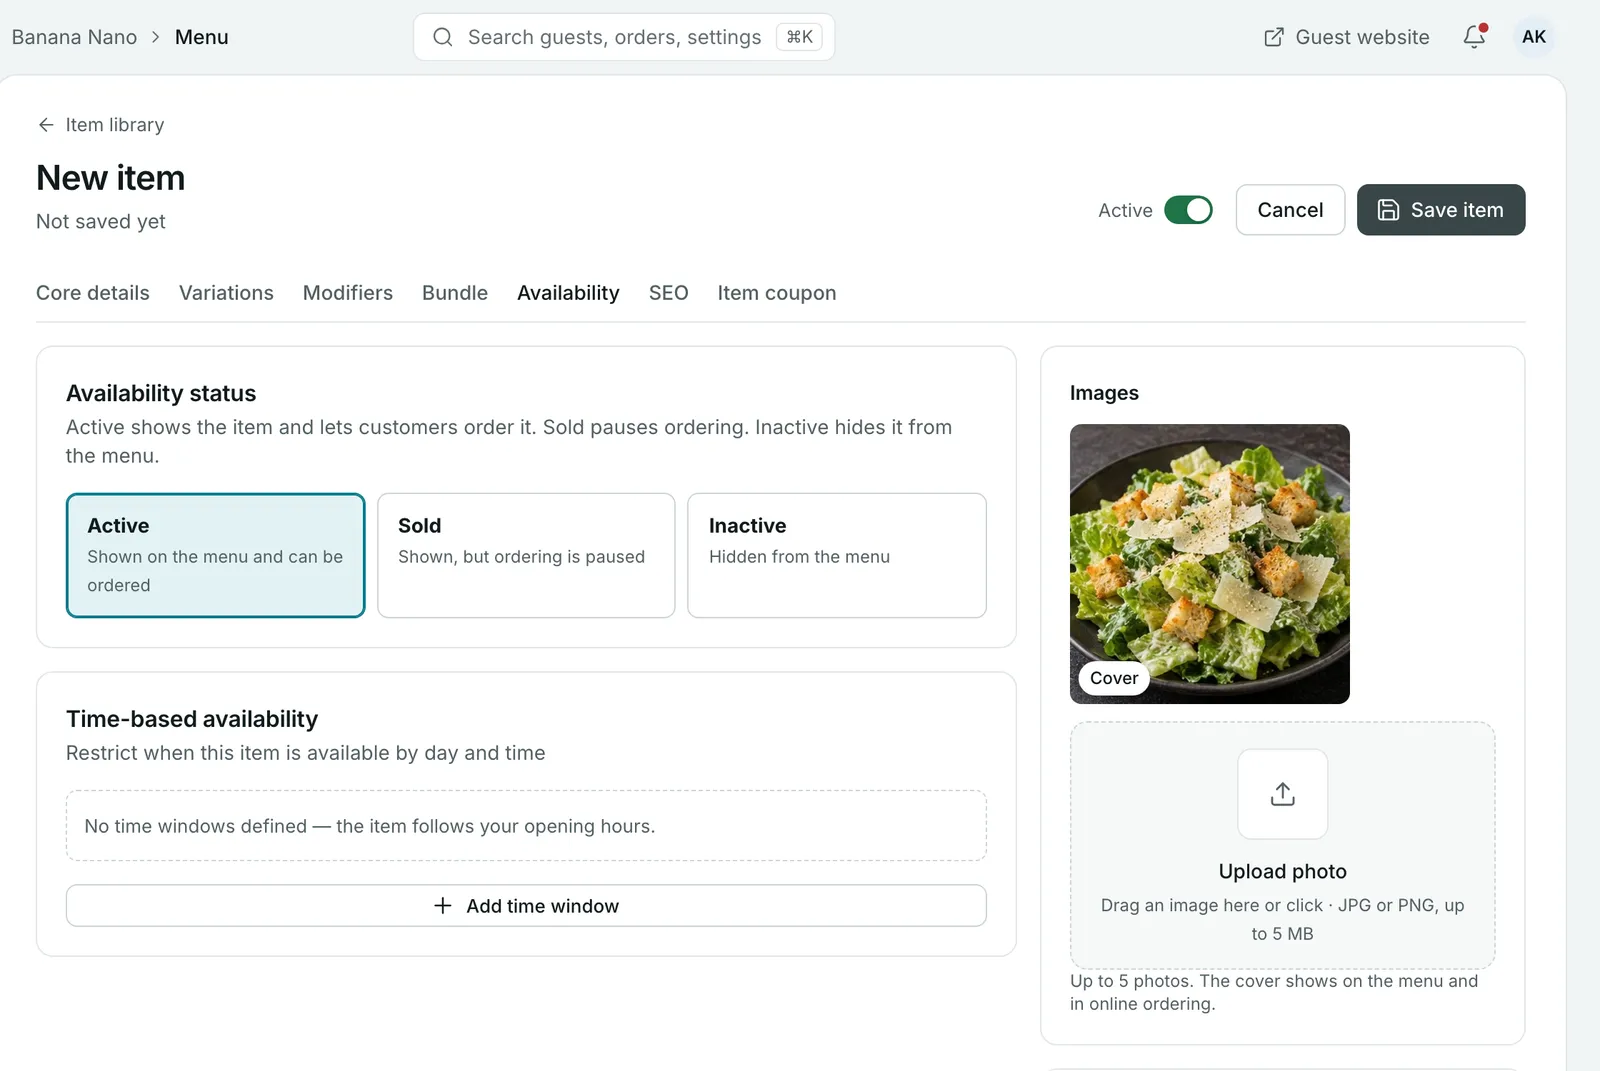
Open the Availability tab to choose a status:
| Status | On the menu? | Can guests order it? |
|---|---|---|
| Active | Yes | Yes |
| Sold | Yes | No, ordering is paused |
| Inactive | No | No |
Use Sold when you run out during service, so guests see the dish is normally available. Use Inactive for dishes you’re not serving at all, such as last season’s specials.
To offer a dish only at certain times, like a lunch menu or weekend brunch, select Add time window under Time-based availability. Without a time window, a dish follows your opening hours.
Step 7: Help guests find your dishes on Google
The SEO tab controls how a dish appears in search results for your Growtality website. Add a Title for search engines of under 60 characters and a Meta description of under 160 characters, and check the Google search preview.
You don’t need to do this for every dish on day one. Start with your best-sellers and signature dishes, the ones people search for by name.
Step 8: Save and check your menu as a guest
- Select Save item. The Active switch next to it decides whether the dish goes on your menu straight away.
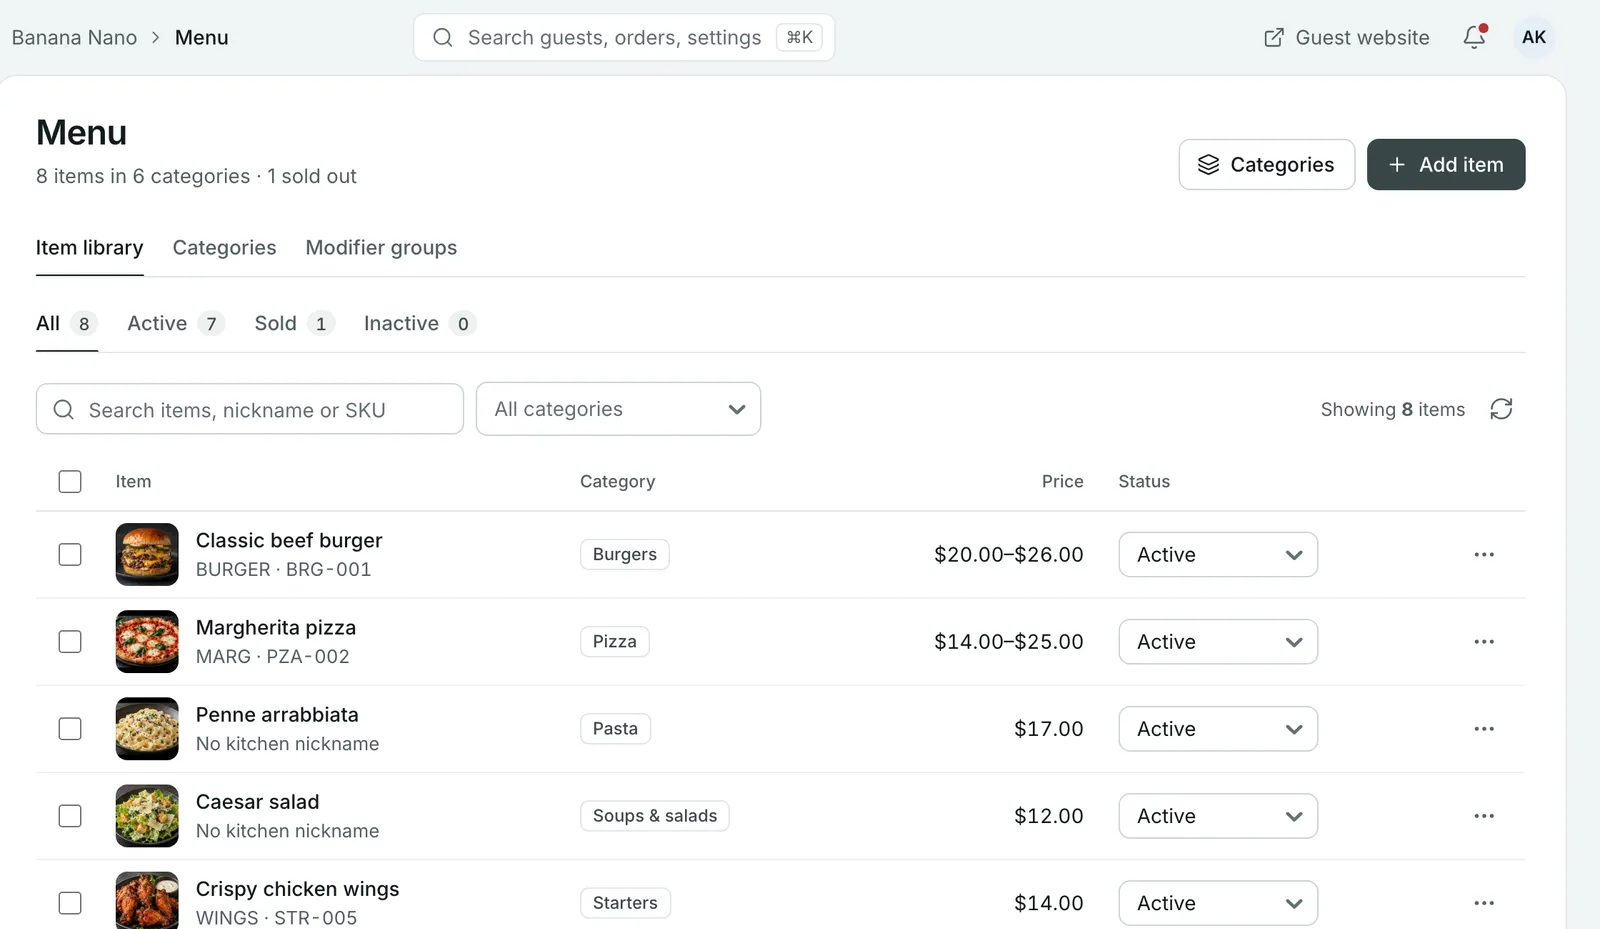
- Back in the Item library, use the All, Active, Sold and Inactive filters to check every dish is where you expect.
- Select Guest website at the top of the admin to see your menu the way guests do.
Tips for a menu that sells
- Lead each category with your best-sellers. Guests rarely scroll to the bottom.
- Use the same photo style and background across dishes, so the menu looks consistent.
- Keep sizes as variations instead of separate dishes. One “Margherita” with three sizes is easier to scan than three Margheritas.
- Check allergens whenever a recipe changes, not just when you first set up.
Common questions
How do I mark a dish as sold out?
Open the dish from Menu > Item library, go to the Availability tab and choose Sold. The dish stays on your menu, but guests can't order it until you set it back to Active.
Can I offer a dish only at lunchtime?
Yes. On the dish's Availability tab, add a time window for the days and times it should be available. Without a time window, a dish follows your opening hours.
What's the difference between variations and modifiers?
Variations are versions of the same dish that guests pick one of, such as small, medium or large. Modifiers are extra choices on top, such as sauces, toppings or how a steak is cooked, and you can make them optional or required.
Do I need a photo for every dish?
No, but dishes with photos are easier to order. You can add up to 5 photos per dish (JPG or PNG, up to 5 MB each), and the cover photo shows on your menu and in online ordering.
Can Growtality set up my menu for me?
Yes. Setup and moving your menu from your current system are free. Ask your account manager and the team will build it for you.
Still stuck? Submit a ticket
Tell us what you're trying to do. We'll attach this guide to your ticket, so you don't have to explain it twice.