
How to set up your restaurant floor plan and tables
Draw your rooms and tables once, with real seat counts, so online bookings, walk-ins and table assignments always match your actual floor.
Your floor plan is what Growtality books against. If the terrace has four tables of two in real life but six on screen, you’ll take bookings you can’t seat. Set it up once, carefully, and every booking and walk-in after that fits your real floor.
How it’s organised
- A floor is a level of your building, such as Ground floor.
- A room is a dining area on that floor, such as Main dining or Terrace.
- Tables sit in a room, each with its own number and seats.
Go to Settings > Rooms to see all three. The totals at the top show your floors, rooms, tables and seats.
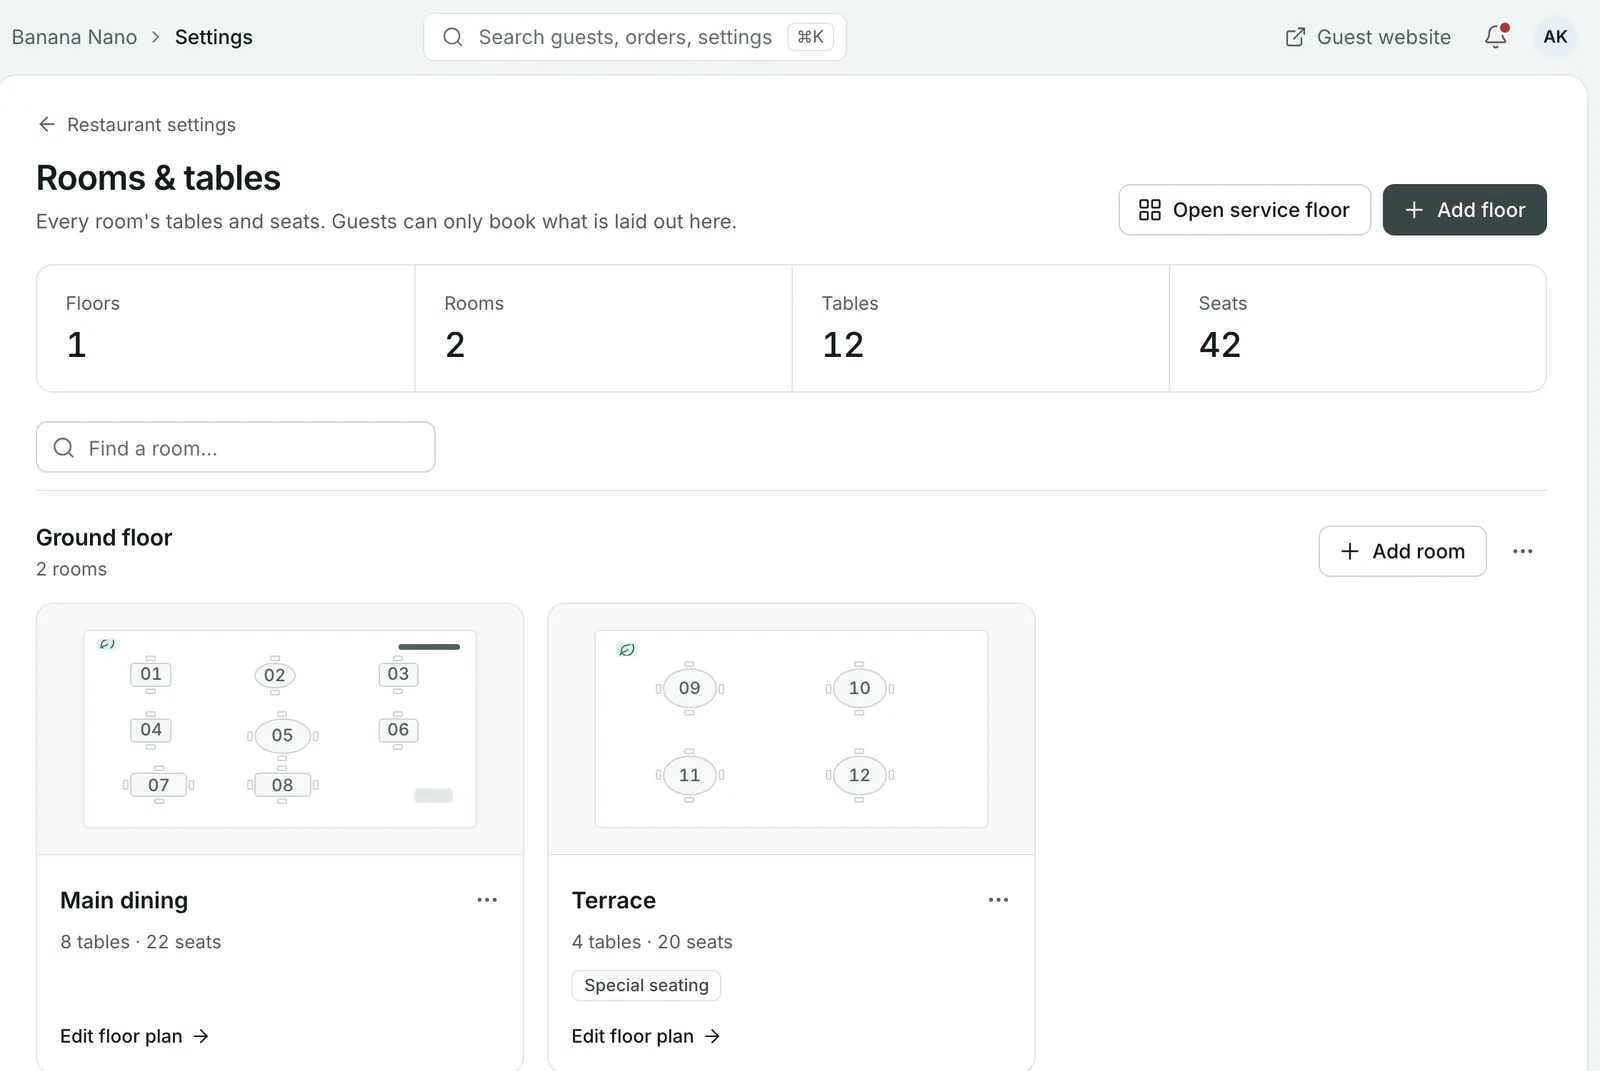
Step 1: Add a floor and your rooms
- Select Add floor and give it a name.
- On that floor, select Add room.
- Enter the Room name.
- If the room needs special handling, such as a terrace or private room, turn on Special seating area. You can then turn on Require manual approval, so bookings for this room wait for you to approve them.
- Select Save room.
Repeat for each dining area.
Step 2: Draw the tables
Select Edit floor plan on a room. The editor opens with three panels: shapes on the left, the room in the middle and Properties on the right.
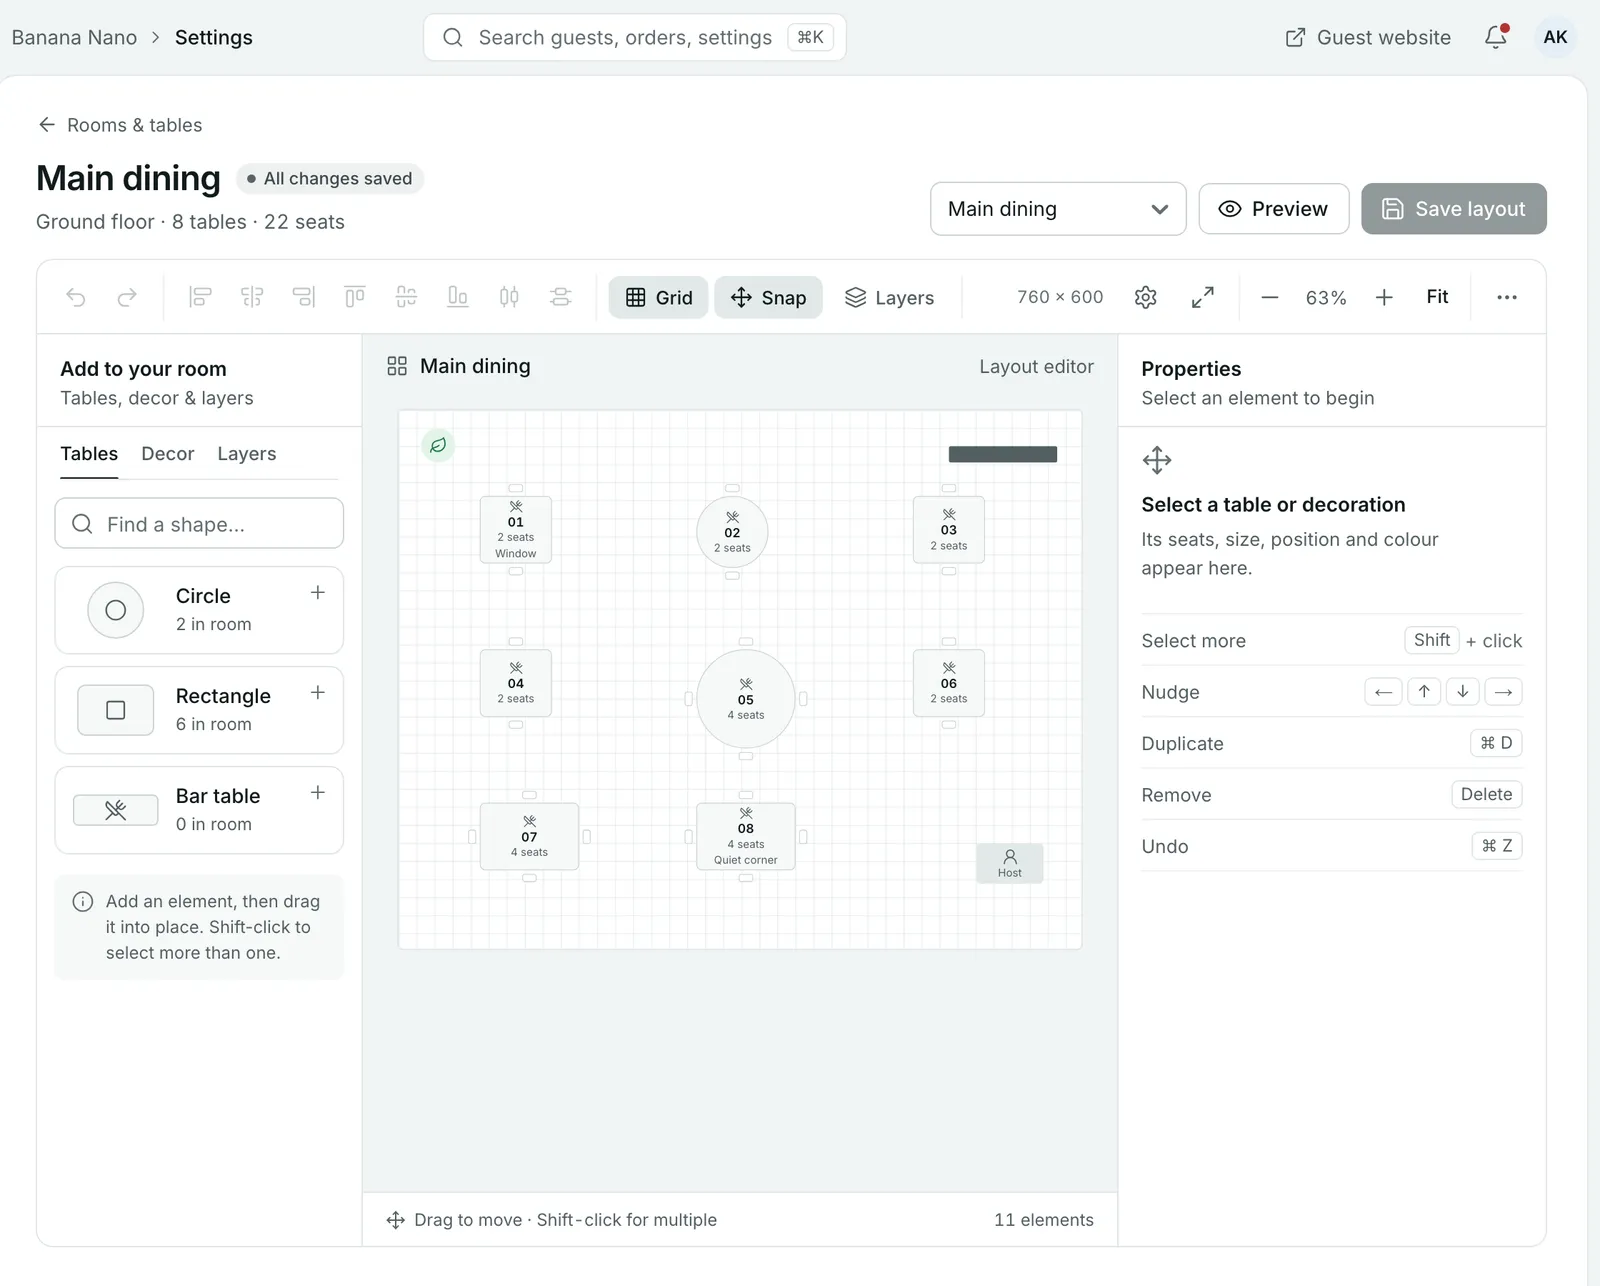
- In Add to your room, choose a table shape: Circle, Rectangle or Bar table. It appears in the room.
- Drag it into place. Shift-click to select several tables and move them together.
- Use the Decor tab to add walls, doors, windows, pillars, a bar counter or the host stand, so the plan looks like your floor.
Step 3: Set each table’s details
Select a table to edit it in Properties:
- Table number: the number your team calls it by.
- Minimum guests and Maximum guests: the party sizes it can seat.
- Bookable online: turn this off for tables you keep for walk-ins.
- Combine with another table: for tables you push together for larger groups.
You can also set its size, rotation and colour.
Shortcuts save time with lots of tables: ⌘ D duplicates a table, Delete removes it and ⌘ Z undoes. On Windows, use Ctrl instead of ⌘.
Step 4: Save the layout
Select Preview to check it, then Save layout. If you try to leave or switch rooms with unsaved changes, Growtality asks whether to save or discard them.
Using the floor during service
The layout you save here is the one your team works from on Tables & floor plan. That page shows which tables are available, occupied or reserved right now. Select a table to see who’s booked on it tonight and change its status.
Tip: Set Maximum guests to the number you’d actually seat at a table on a busy night, not the most chairs you could squeeze round it.
Common questions
Why can't guests book a table I've added?
Check the table's Bookable online setting, and that its minimum and maximum guests fit the party size. Also check the layout was saved: the editor shows Save layout until your changes are stored.
Can I combine two tables for a larger party?
Yes. Select a table and use Combine with another table in its properties.
How do I keep a private room for approved bookings only?
Edit the room, turn on Special seating area, then Require manual approval. Bookings for that room wait for your approval before they're confirmed.
Can I copy a layout to another room?
Yes. Use Export layout JSON in one room and Import layout JSON in another. Importing replaces the draft, and you can undo it.
Still stuck? Submit a ticket
Tell us what you're trying to do. We'll attach this guide to your ticket, so you don't have to explain it twice.